Poorlaggedman wrote:Also I've seen frontage mentioned here but I'm not real certain with it... Are certain provinces easier to defend because of it.
Thanks
There's some information, including formulas, here.
Poorlaggedman wrote:Also I've seen frontage mentioned here but I'm not real certain with it... Are certain provinces easier to defend because of it.
Thanks

I'm a little confused because the structure was showing as totally breached in Tappahanock. Yet I was still making breaches instead of hits which I wanted to inflict. Up to 14 before he moved out and I assaulted him.
Which leads me to another question.
POWs. Why when an exchange happens, does it say ~100,000 or so POWs were released by each side when I'm *positive* I didnt lose that many and I only had about ~30,000 in my camps. Also, when you wipe out a unit that has been suffering from supply drops, you seem to capture more prisoners than were actually present at the start of the battle. Is this including the troops who were lost to attrition??? I suppose maybe they were just combat ineffective but still.
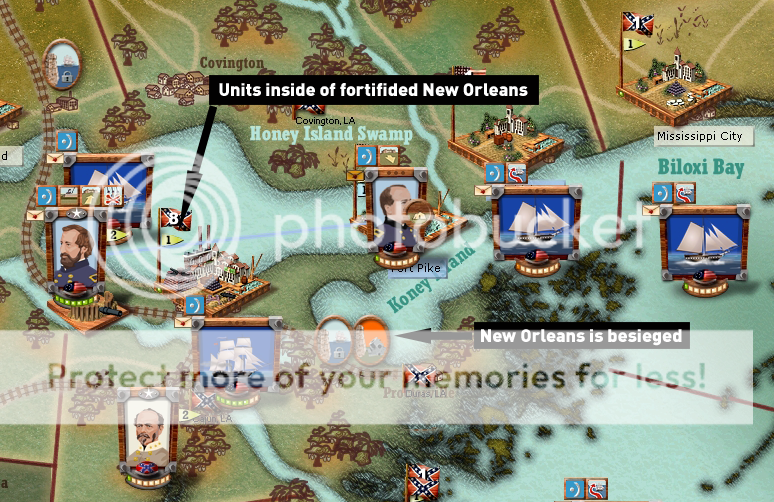
There are 3 yankee Corps holed up in Fort Monroe, they were pushed there from an earlier campaign. I naturally want to cut them off/destroy them. Probably impossible with the Yankee navy but I'd still like to try! I am doing great financially/economy-wise and have a decent little Navy that can compete with smaller Union Navy's. However there's a massive Union Navy in the James River just past Fort Monroe. I just drove back an invasion around the Norfolk area and built a fort at Norfolk. I have 3 Coastal batteries there (2 of which I captured earlier) and I'm hoping this can help blockade/keep Yankee Navy from destroying mine/lifting the blockade once I place it. However I am unsure which sea zone the Fort overlooks and can interdict. Is there any way to tell?
 .
.I am also wondering if it makes a difference whether there is a leader in the fort with the fort's batteries and whether they have a command penalty. I just put Beuregaurd there with his fort defender ability and gave the batteries to his stack.
 . But once the opposing side has lost, their ability to resist is so limited that the whole thing just becomes an exercise in managing a large number of huge armies vs a much smaller number of forces that cannot really defend themselves anymore. In one such exercise as the CSA after having taken everything except New England, NY, PA and a small part of WV I gave up, because I was playing against the engine to keep my armies in supply by capturing depots and large cities more than anything else
  .
.


Return to “AGEod's American Civil War”
Users browsing this forum: No registered users and 42 guests